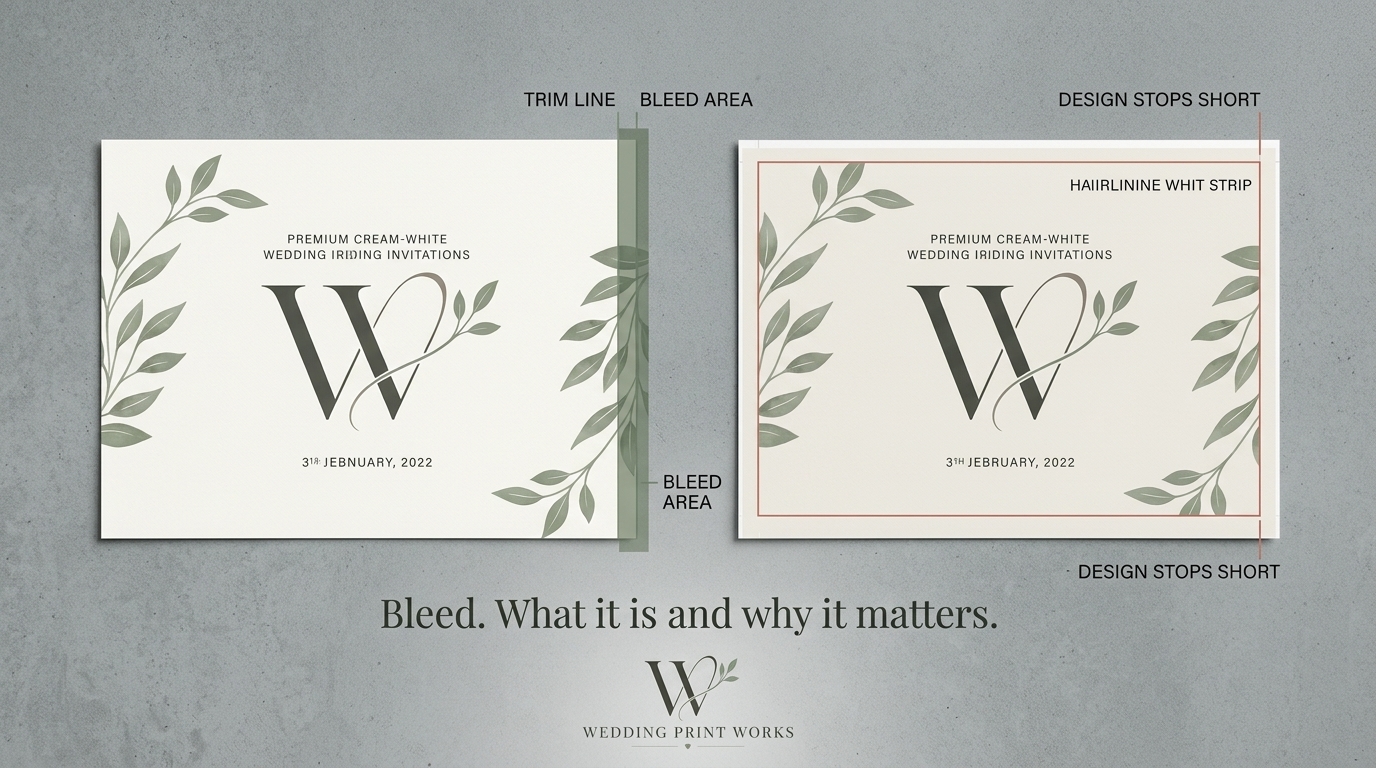
A wedding invitation can look immaculate on screen but show a thin white edge after trimming. This often happens when colour or imagery stops exactly at the finished edge instead of extending beyond it. That extra artwork is called bleed.
For stationery designers, getting bleed right is a straightforward way to reduce avoidable production issues. It matters on standard rectangular cards and needs particular attention on shaped designs, where the cut follows a curve or contour. Always check the printer’s artwork specifications before preparing a file: bleed requirements and file preferences can vary.
What is bleed in printing?
Bleed is the part of the artwork that extends beyond the intended trim line. During production, the sheet is cut to the finished size and the bleed is removed. Because cutting can involve small variations in position, extending the artwork past the edge helps prevent the unprinted paper showing at the finished edge.
A bleed of 3 mm is commonly requested, but it is not a universal rule. Use the amount specified by your print partner, including for any shaped or die-cut work.
Bleed, trim line and safe area
Trim line
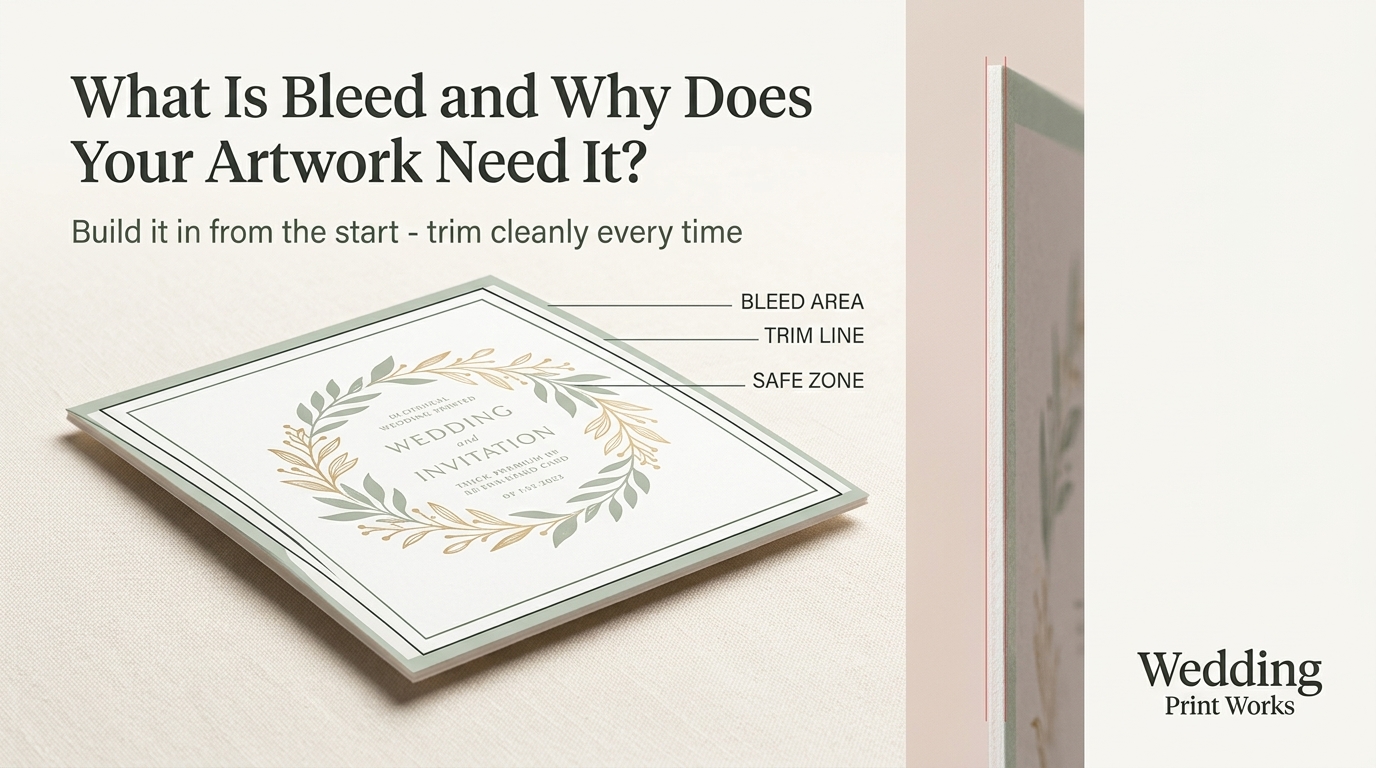
The trim line marks the intended edge of the finished piece. It is a guide for production, not an area where important details should sit precisely: slight movement during cutting can affect the final position of the edge.
Bleed area
The bleed area sits outside the trim line. Extend any background colour, photograph, pattern or other edge-to-edge artwork into this area. The bleed is cut away, so it should not contain details that need to appear on the finished card.
Safe area
The safe area is inside the trim line. Keep names, dates, wording, logos and other important details comfortably within it. The appropriate margin depends on the design and the printer’s guidance; a border placed very close to the edge can also look uneven if the cut shifts slightly.
When does wedding stationery need bleed?
Bleed is needed wherever artwork is intended to reach the finished edge. For example, if a coloured background, illustration or photograph runs to the edge of an invitation, it should extend beyond the trim line.
If the design has an unprinted border and the paper itself forms the edge, bleed may not be needed for that area. However, follow the printer’s file requirements and consider whether the border will still look balanced if the cut varies slightly.
Setting up artwork for print
- Confirm the finished size and bleed requirement. Check the printer’s specifications before setting up the document. Do not assume the same amount applies to every product or shape.
- Extend edge-to-edge artwork. Continue backgrounds and other elements that should reach the edge beyond the trim line, through the full bleed area.
- Keep essential details inside the safe area. Allow room between the trim line and any text or important design elements.
- Export and check the file. Make sure the exported PDF includes the required bleed and is set to the correct finished size. Follow instructions about crop marks rather than adding them by default.
- Review the whole design at actual size. Check that no important details are too close to the edge and that backgrounds reach the edge of the bleed area.
Using InDesign, Illustrator or Canva
In Adobe InDesign, you can enter bleed values in the document setup and include the bleed when exporting a PDF. In Illustrator, set the document bleed and make sure it is included in the PDF export settings. In Canva, use the available bleed option when downloading a print PDF, then check the exported file against your printer’s requirements. Software settings do not replace a final check of the supplied artwork.
Bleed for shaped and die-cut stationery
Arches, waves, scallops and other shaped cards have a cut line that follows the outline of the design rather than a simple rectangle. Artwork intended to run to the edge needs to extend beyond that contour, following the printer’s supplied template or instructions.
Keep wording and other important details well inside the cut line. On scalloped or curved edges, details placed close to the outline can appear uneven or may be affected by small variations in cutting. Check that the bleed is continuous around the entire shape, including curves and corners.
Common bleed mistakes to avoid
- Stopping artwork at the trim line. This can leave unprinted paper visible if the cut falls slightly outside the intended edge.
- Adding bleed without extending the artwork. A larger page or bleed setting alone does not create extra artwork; the background or image must continue into that area.
- Putting text too close to the edge. Bleed protects the edge-to-edge artwork, while the safe area protects important content.
- Using a rectangular bleed for a shaped design. For shaped work, the artwork needs to extend beyond the actual cut contour.
- Assuming every printer uses the same settings. Confirm bleed, document size, file format and crop-mark requirements with your production partner.
Frequently asked questions
How much bleed should I add to wedding stationery?
Use the amount specified by the printer. A 3 mm bleed is common, but requirements can differ, particularly for shaped or die-cut products.
Does a white-background design need bleed?
If the paper is white and no printed element reaches the edge, bleed may not be necessary for the design itself. Check the printer’s file requirements, and take care with borders close to the trim line.
Does bleed stop text being cut off?
No. Bleed gives edge-to-edge artwork extra room beyond the trim line. Keeping text and essential details inside the safe area helps protect them from being trimmed.
Should I add crop marks to my PDF?
Only if the printer asks for them. Some production workflows use the PDF’s page and bleed information without customer-supplied crop marks, so follow the supplied file instructions.
For designers arranging trade wedding stationery printing, a clear artwork template and file specification can make repeat production easier across invitations, information cards and coordinated pieces. Wedding Print Works provides production support for stationery businesses while they retain their own designs, brand and customer relationships.